Thursday, February 11, 2010

Banana Nut Muffins


When I have "free time" on my hands, I usually get the itch to bake. Since I was snowed in this week after two back-to-back snowstorms, I had plenty of free time on my hands to crank out some goodies. I ended up only making banana nut muffins and brownies, although I would have made some cookies had I not run out of butter.

These banana nut muffins are a great easy way to use up old bananas. Since we have those around the house on a regular basis, it is not uncommon that sometimes they don't all get eaten. Instead of throwing them away, I make muffins. My husband prefers the muffins over banana bread because it is so much easier to grab these on the go, and they are quite close to bite size! The real recipe calls for macademia nuts, which I imagine would be amazing, but since I usually don't have those stocked in my pantry, I usually substitute walnuts which works great. Give them a try sometime!


Banana Nut Muffins
adapted from Bon Appetit

1 1/2 cups unbleached all purpose flour
1 1/2 teaspoons baking soda
1/4 teaspoon salt
1/8 teaspoon ground nutmeg
1 1/4 cups mashed ripe bananas (about 3 large)
1/2 cup sugar
1/4 cup firmly packed dark brown sugar
1/2 cup (1 stick) unsalted butter, melted
1/4 cup milk
1 large egg
1 cup unsalted macadamia nuts, toasted, chopped [or walnuts]

Preheat oven to 350°F. Grease twelve muffin cups or line with muffin papers. Sift first 4 ingredients into large bowl. Combine bananas, both sugars, butter, milk and egg in medium bowl. Mix into dry ingredients. Fold in half of nuts. Divide batter among prepared muffin cups. Sprinkle tops of muffins with remaining macadamia nuts. Bake until muffins are golden brown and tester inserted into center comes out clean, about 25 minutes. Transfer muffins to rack and cool.

Thursday, January 28, 2010

Treading water

I've got a LOT going on. Maybe a little too much. So far I feel like I have all the projects I'm carefully juggling still up in the air... but I'm afraid I might drop one.

Project 1: photography... or should I say "Project 365". This is going pretty well so far and I feel like I learn something new about myself and my photography every day. Last night was also my first time attending a meeting of the Central Maryland Photographers Guild where I met a bunch of other photo enthusiasts like me. While I didn't necessarily feel like I took home a wealth of information from the topics specifically presented at the meeting, I did have some great conversations with some other experienced members about some photo editing software that I have had my eye on, and ended up leaving the meeting with a fresh outlook on my options in that area. I'm really hoping to get some more out of this club in the future; I'm especially hoping for some more constructive criticism of my work and some group field trips to work on my technique.

Project 2: cake decorating. So I've started on another of my "101 in 1001" tasks by signing up for the second Wilton method cake decorating course. I really enjoyed the skills I learned in the first course, but was a little frustrated with the "informal" feel to the class, which I took at Michael's craft store.

My final cake project from Course 1

This time around, I've signed up to take the class at a local bakery, Cake's Plus. I've heard that their classes are faster paced and a little more "serious" which will hopefully suit me a bit better. In the mean time, I'm also working on a cake masterpiece for my husband's 30th birthday party this coming Saturday. Right now I am up to my eyeballs in batches of colored icing, cake mixes, and other decorating tools. It's by far the biggest cake project I've ever taken on, and I REALLY don't want to screw it up.... especially since it's for an important birthday. :-) I'm keeping the theme a secret for now, but will be sure to blog about the process after the fact, so stay tuned!

And of course, there are lots of social obligations, a trip to Germany/Austria in May to plan, a baby shower to help host (and make another cake for!), and a full time job unrelated to all these projects to stay on top of. Just trying to stay afloat for now....

Tuesday, January 19, 2010

Recipe: Beef stir-fry with Orange and Ginger

Here is another new recipe I tried today. I am definitely WAY over my goal of trying 2 new recipes per month! I really enjoyed this dish, and the best part is that it is fast and easy and requires minimal ingredients. I got a new cookbook last fall that is full of great meals for quick, weeknight dinners, aptly titled "Best Ever 30-Minute Dinners". I will definitely be trying more meals from this book in the future!


Beef Strips with Orange and Ginger

1lb lean beef rump, steak, fillet steak, or sirloin, cut into thin strips
grated rind and juice of 1 orange
1 Tbsp light soy sauce
1 tsp. cornflour
1in piece of fresh ginger root, finely chopped
1 Tbsp sunflower oil
1 large carrot, cut into thin strips
2 scallions (green onions), thinly sliced

Place the beef strips in a bowl and sprinkle over the orange rind and juice. Marinate for 10 minutes or up to 30 minutes if possible.

Drain the liquid from the meat and set aside. Mix the meat with the soy sauce, cornflour and ginger, making sure the meat is evenly covered.

Heat the oil in a wok or large frying pan and add the beef. Stir-fry for 1 minute until lightly colored. Add the carrot strips and stir-fry for another 2-3 minutes. Stir in the scallions and reserved liquid. Cook until sauce thickens, stirring. Serve hot with noodles or rice.

Pasta from scratch

One of the many fun new things I received for Christmas was a Kitchen Aid pasta roller set. I've been coveting this kit for quite a while, but had been putting the purchase on hold due to its relatively hefty price tag... there always seemed to be something else more important to purchase. But here it is... finally... and I couldn't wait to dive in and try my first batch of homemade pasta!

Kitchen Aid pasta roller set with flat roller,
and fettucini & spaghetti cutters


The kit comes with a few various recipes for making the pasta dough. As much as I wanted to try making spinach or whole wheat pasta, I figured I would start with the most basic recipe just to get the hang of the whole process before adding more complicated steps/ingredients. Turns out the process is quite easy and before I knew it, I had a nice little ball of pasta dough ready to feed into the first roller.

Ball of basic pasta dough

The dough gets divided up into 4 pieces, flattened slightly by hand, and then slowly fed through the flat roller on the lowest number setting which provides the widest roller. After kneading the dough through a few times, the roller width gets slowly decreased to make the pasta thinner and thinner until the desired thickness is reached, at which point it gets fed through the cutter of choice. Or if you are making lasagne noodles or ravioli (which I am really anxious to try!) then no cutting is required.

Cutting my pasta sheet into fettucini

And here they are... the final pasta "nests"! The pasta was dried before forming into nests. It can either be cooked immediately, refrigerated, or placed in plastic bags and frozen for up to 4 months. I froze most of what I made but save some for fresh pasta with homemade sausage sauce for dinner that night. It was delicious... less chewy than the store bought stuff, and much lighter in texture. Can't wait to try making more again soon!

Finished "nests" of fettucini

Monday, January 18, 2010

Photo-walk: 1/18/10

What better way to spend a day off of work than heading out for my first photo-walk! I realized when I headed out with my camera this morning that I have taken my camera out with me before with the sole intention of taking photos.... but that was usually when I was on vacation. This time, I was out on a mission to capture images of everyday life rather than monuments I want to remember visiting. I am pretty happy with how most of the photos turned out. Of course not every photo was a "winner", but here are some of my favorites.


Friday, January 15, 2010

Recipe: Pork Chops with Shallot-Apple Cider Pan Sauce

My first recipe post! Before I talk about this wonderful recipe, I'll take a quick minute to tell you a little bit about the food side of my personality.

I. LOVE. FOOD. Even more than food, I LOVE sweets, especially chocolate. I can not stress that enough. I have a sweet tooth to rival most, and so I love baking. Baking not only allows me to creat decadent desserts that will hopefully satisfy my insane sweet tooth (at least for a little while), but it also allows me to express more creativity by trying out new recipes. Most of the time, cooking and baking are fun for me, and I love to entertain.

Regarding skill level, I would say that I'm somewhere in the middle. Rarely do my recipes turn out complete disasters, and I can occasionally throw together something for dinner from scratch without a recipe, but more often than not, I prefer to use a recipe at least as a starting point. Thus, I love cookbooks and food magazines, and lately I've been following a number of cooking and baking blogs, which is how I found this recipe.

This recipe popped up in my Google Reader with perfect timing. I knew I was going to make pork chops for dinner that night, but was wishing I had a new recipe to try out instead of using my typical stand-bys. Up pops this awesome sounding recipe from elly says opa : Pork Chops with Shallt-Apple Cider Pan Sauce. YUM! And they were every bit as tasty as they sounded. Be sure to try it out, and enjoy!

[I am sorry to say that I somehow lost the photos I took of my recipe, probably while going through the 365 images... elly has a picture on her page if you are still curious]

Pork Chops with Apple Cider Pan Sauce

2 lean pork chops
thyme
sage
salt & pepper
2 tsp. olive oil
2 tsp. butter
1 large shallot, sliced
1 clove garlic, minced
1/3 cup apple cider
1/3 cup chicken broth

Sprinkle the pork chops with salt, pepper, thyme, and sage. Heat the oil in a skillet over medium head and add pork chops. Cook until done, about 4mins per side. Remove from skillet to plate and cover to keep warm.

Add the butter to the pan, and then add the shallot. Cook until the shallot is tender and then stir in the garlic. Once the garlic is fragrant, increase the heat slightly and add the apple cider to de-glaze the pan, scraping up the browned bits on the bottom of the pan. Allow the cider to bubble away and reduce by about half.

Add the chicken broth and salt and pepper to taste, and let that reduce until the amount of sauce you have left in the pan is about 1/3 cup total. Spoon the sauce over the pork chops and serve.

Wish List

As I continually look over my "101 in 1001" list of things to accomplish, I keep finding myself adding things to my Amazon wish list. I love this feature on Amazon. It helps me keep a running tally of all the things I'd like to own, and when people ask for Christmas lists and such, I have something ready to give them!

Of course I am currently trying to pace myself... don't want to buy everything off the list at once. My most recent purchase was some travel guide books for our upcoming vacation in (hopefully) May. We are planning on trying to make it back over to Europe to tour Germany and Austria. The past couple trips we've taken to Europe have taken a lot of time to plan, so I went ahead and ordered books to start the planning process.

My recent delve into the Project 365 world has immediately added a number of photography items to my wish list. I'm setting these items up as "rewards" for myself along the journey. I'll probably treat myself to one item after I complete my first month of the project. Right now, I'm longing for:

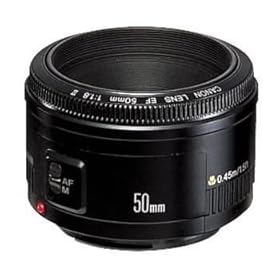
1) Canon EF 50mm f/1.8 lens for my dSLR
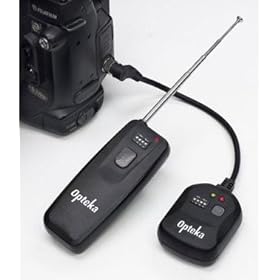
2) Opteka Wireless Remote Release for Canon cameras

3) Adobe Photoshop Elements 8


On the non-photography side, I am drooling over a few new gadgets for my kitchen, including:

4) Wood Pastry Board, for bread making, pasta making, and other dough-related tasks
5) Silpat non-stick baking tray liners
6) Mini-muffin pan, to make pecan tassies (yummm...)

7) Round cookie cutter set, for biscuits, cookies, and many other baking items

I am also yearning for a set of packing cubes, as I am determined to only bring a small suitcase on our trip to Germany in May, and I'm hoping these will help me pack more efficiently

8) Packing cubes